Coffee Machines
How to Use the Ninja Cafe Luxe Premier Series Coffee Machine: A Complete Guide
Step-by-step instructions for operating the Ninja Cafe Luxe Premier Series, from powering on through espresso extraction and milk frothing.
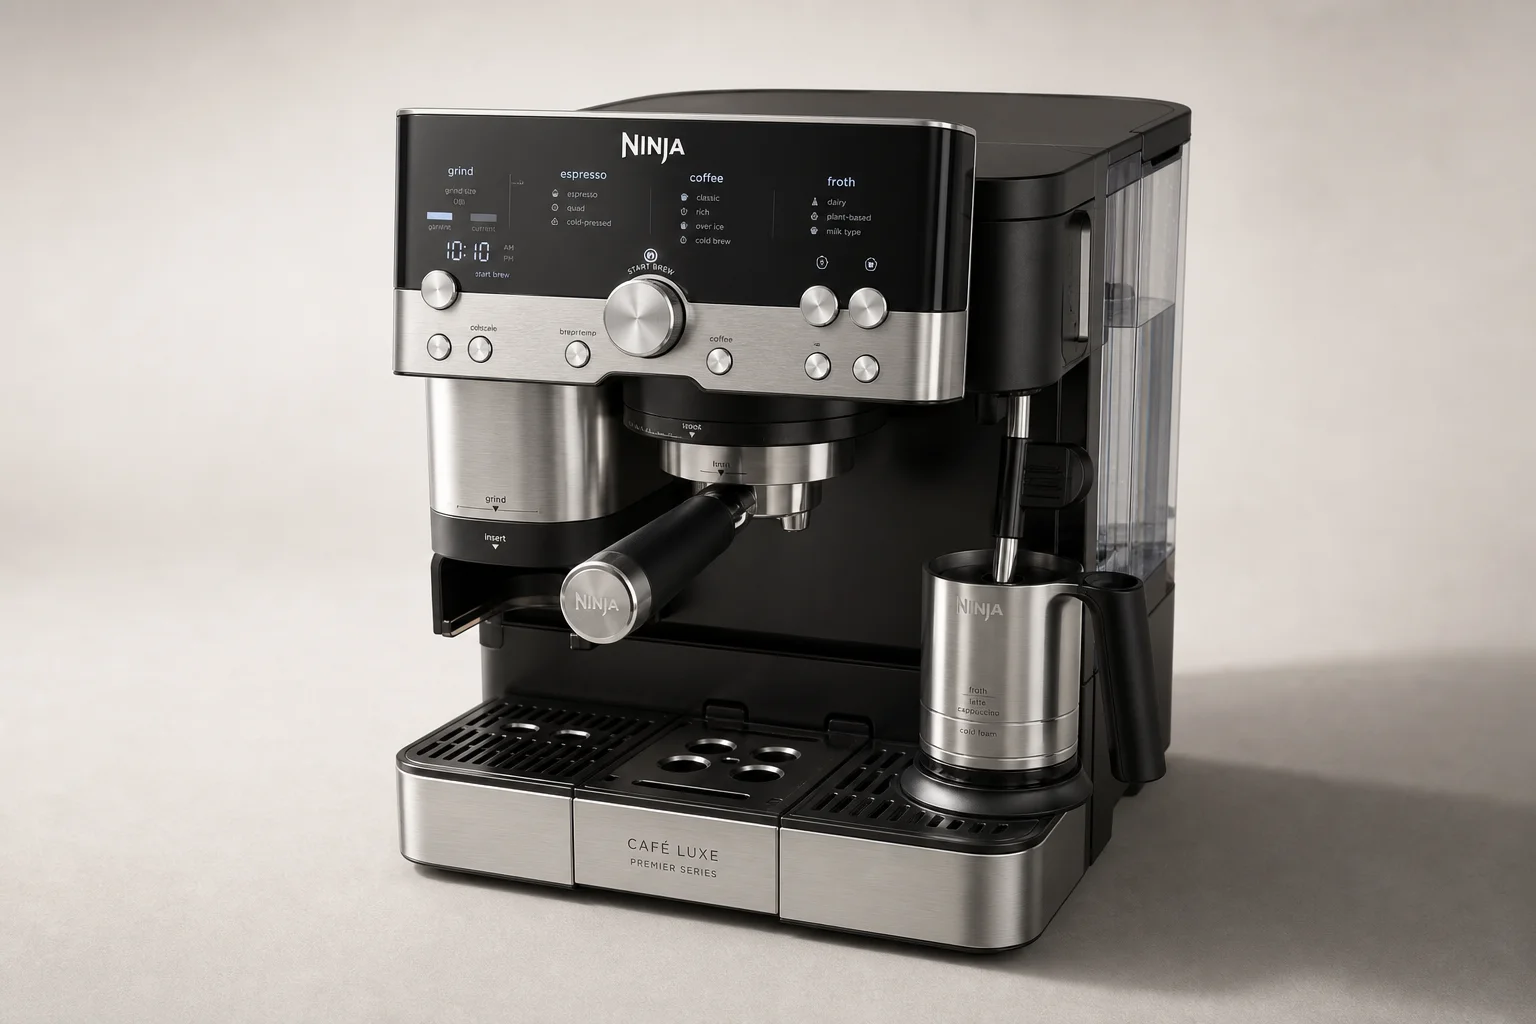
Getting Started: Power and Bean Setup
The Ninja Cafe Luxe Premier Series is a fully automatic bean-to-cup espresso machine that handles grinding, tamping, and extraction in a single workflow. To begin, locate the power button on the bottom left side of the machine and press it to wake the system. Make sure the machine is plugged in before attempting to power on.
Next, check the bean hopper to confirm it contains coffee beans. If beans are already loaded, the machine will display a recommended grind size on its interface. If the hopper is empty, remove the lid and add your preferred beans. Running the machine through a few brew cycles will automatically calibrate the grind size to the machine’s recommendation.
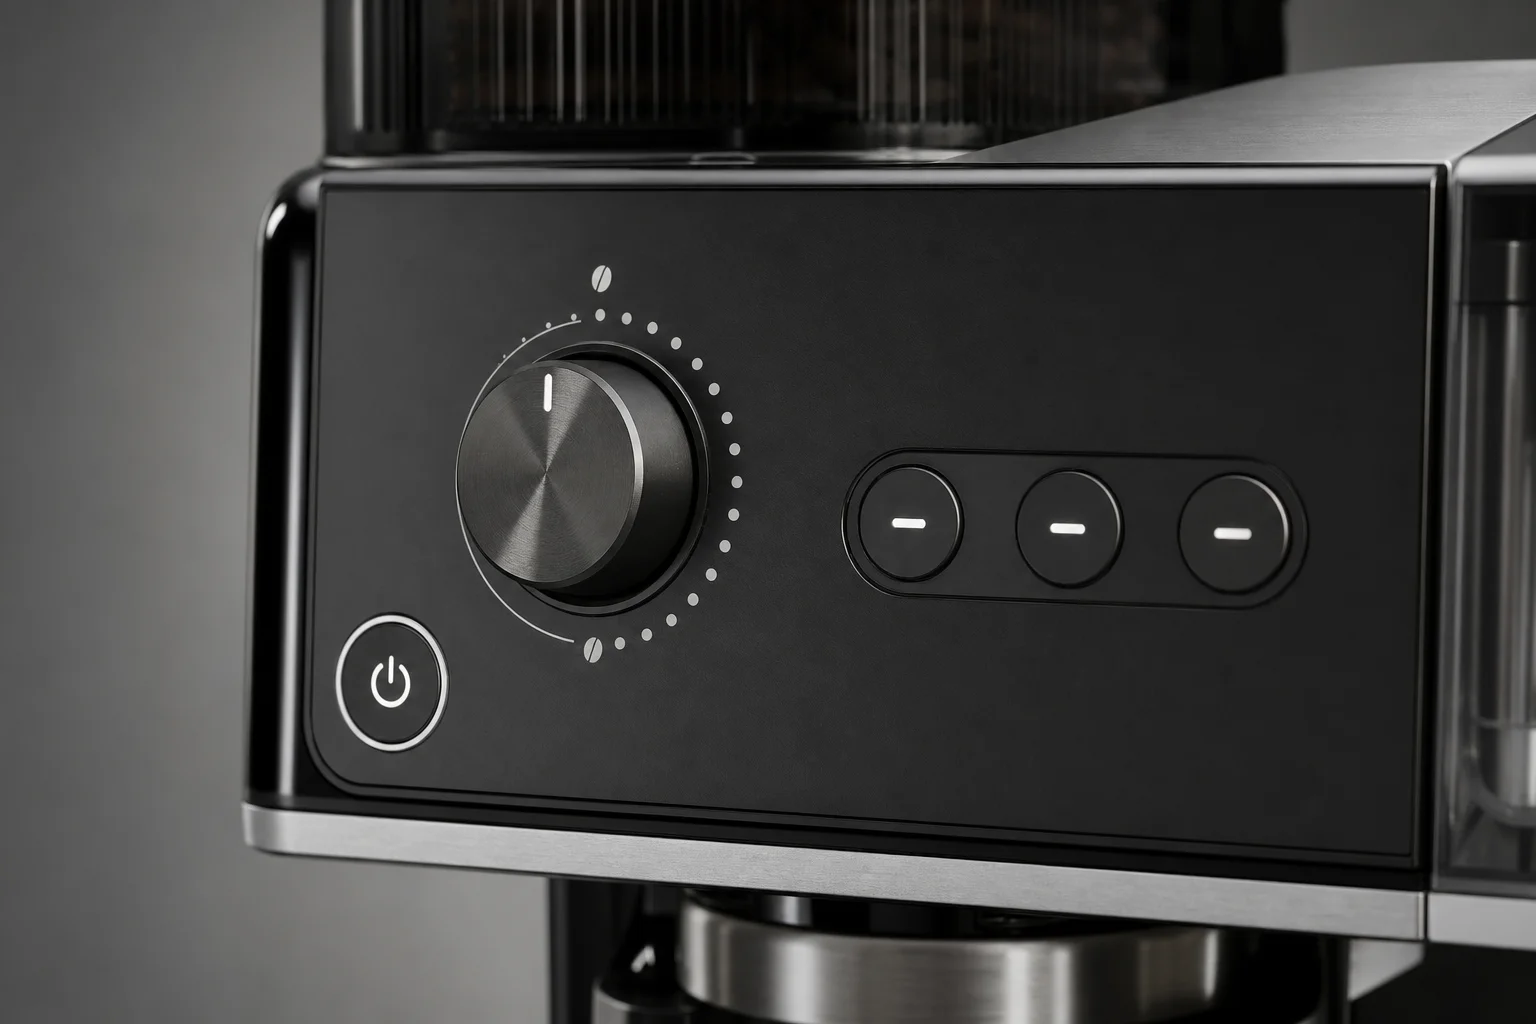
Before proceeding, verify that the water tank is filled above the minimum line. The water tank is accessed from the top of the machine. Fill it generously to ensure you have enough water for multiple cups without the tank running dry mid-brew.
Preparing the Portafilter and Selecting Basket Size
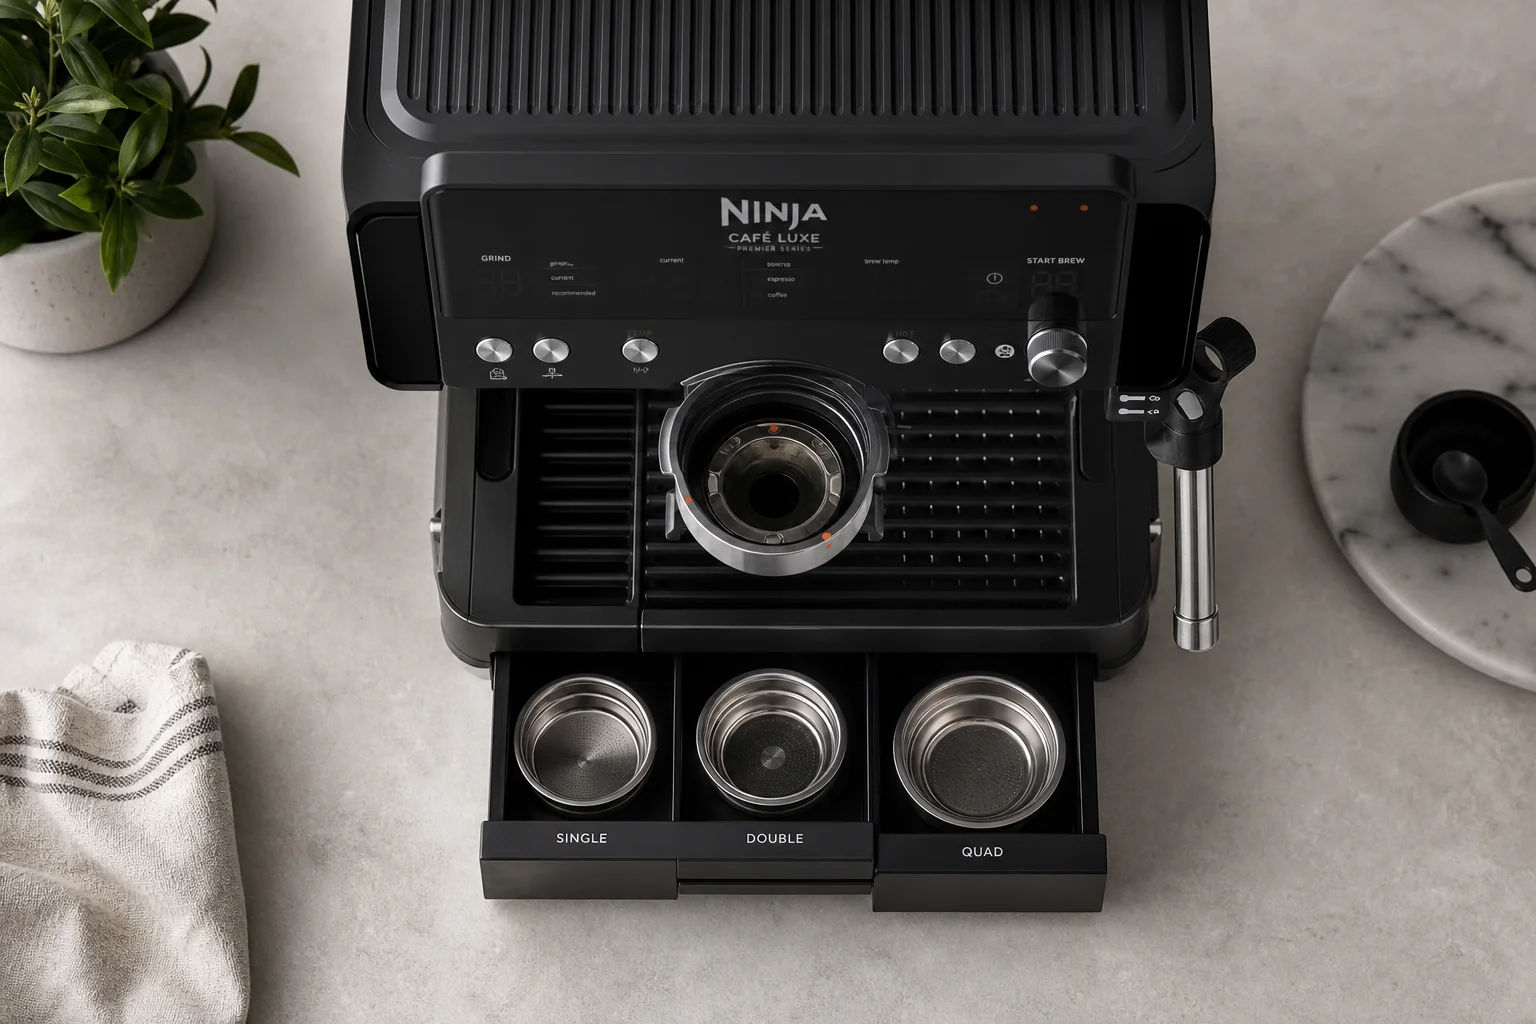
The portafilter is the handle that holds your ground coffee during extraction. To remove it, rotate it to the left until the orange alignment dot on the portafilter meets the orange dot on the machine, then gently pull it free.
The machine comes with multiple basket sizes stored in an accessory drawer on the right side. A single basket produces one espresso shot, the double basket yields a double espresso, and a larger quad basket is designed for filter-style coffees. To swap baskets, grip the rubber section inside the current basket, pull it out, and line up the grooves of your new basket before pressing it firmly into place until it clicks.
Grinding and Funnel Installation
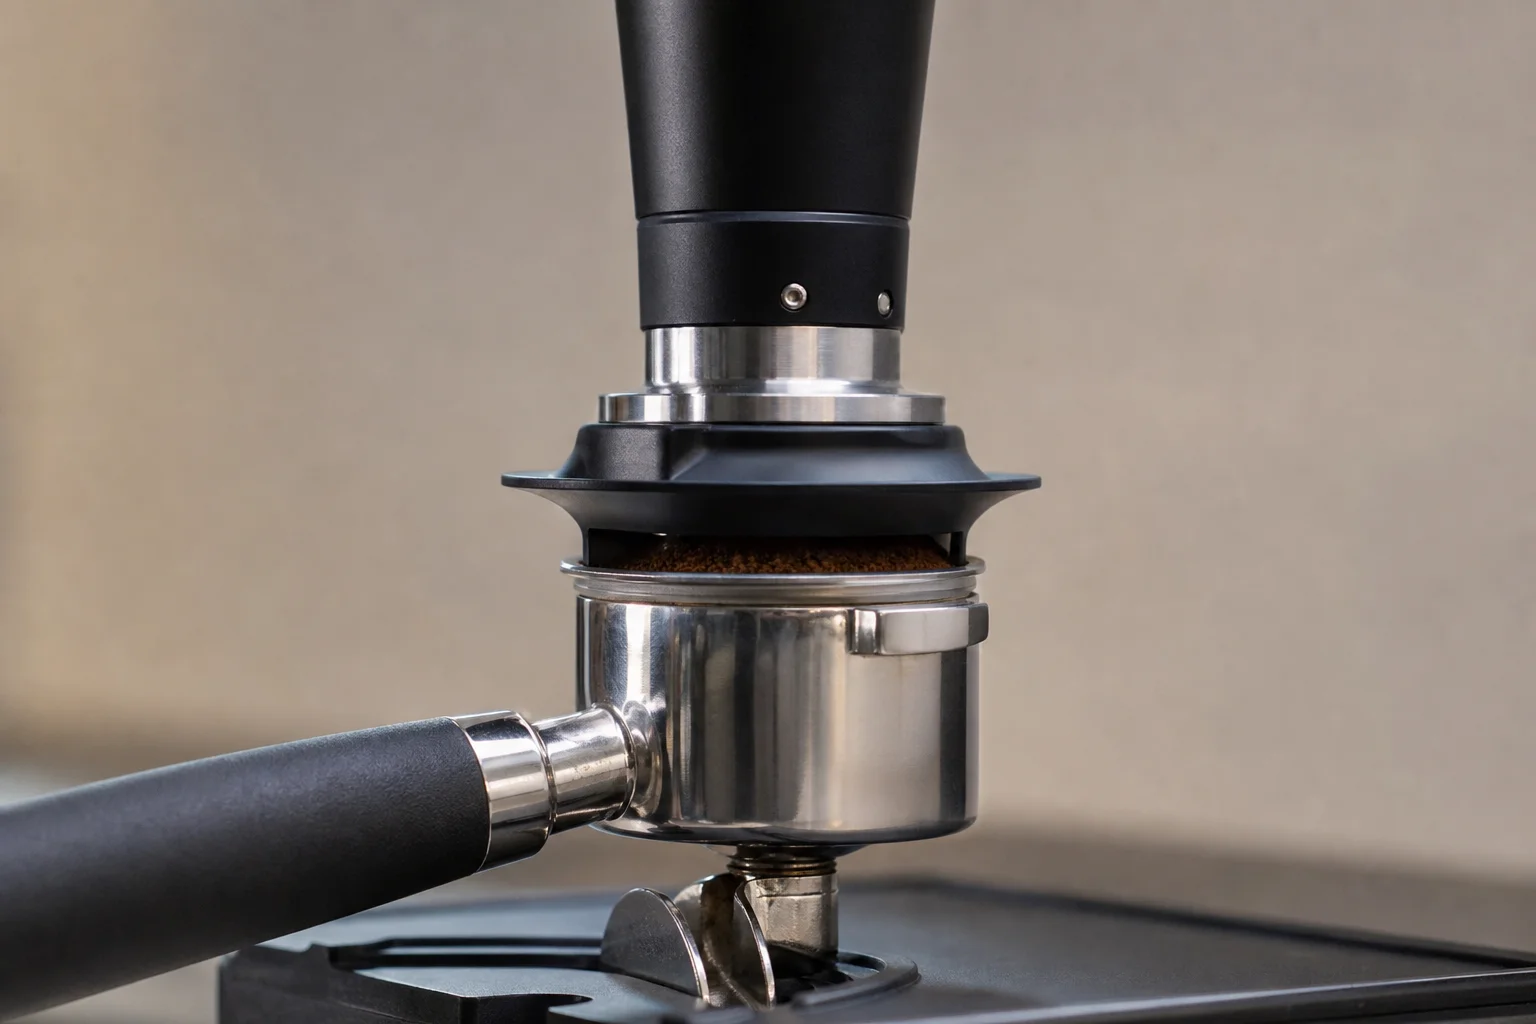
Before grinding, install the funnel onto the portafilter. The funnel sits between the grooves at the top of the portafilter and helps direct ground coffee into the basket without spillage. Slide it into position and ensure it is secure. The machine will display “Insert Funnel” in red if it is not seated properly.
You can adjust the coffee strength using the strength button beneath the strength indicator. The dial offers three levels: one for weaker coffee, two for medium, and three for stronger. For most purposes, the middle setting provides balanced results.
Press the “Start Grind” button to begin grinding. The grinder will dispense ground coffee directly into the funnel and basket below. Once grinding is complete, remove the portafilter and gently shake it to level the grounds.
Tamping and Extraction
With the funnel still attached to the portafilter, place the assisted tamper into the funnel on a level surface and press downward until it meets the funnel. The assisted tamper automatically applies the correct pressure, eliminating guesswork. If the tamp does not look even, repeat the process to ensure a consistent surface.
After tamping, remove the funnel and set it aside. Reinsert the portafilter into the machine by aligning the orange dots and rotating clockwise until it locks into position.
Adjust the cup shelf height to match your cup size. The shelf has multiple position settings; tilt it slightly, slide it into the grooves, and let it rest. Position your cup under both espresso spouts, as the machine dispenses from both sides.
The machine offers an espresso or Americano setting. For espresso, press the dial in the center to start the brew. The extraction typically takes 25-30 seconds. If you want to add hot water to create an Americano after the espresso is complete, position a cup under the hot water spout and press the hot water button, then press the brew dial again to dispense.
Monitor the drip tray indicator dot on the side of the machine. As the tray fills, the dot rises and turns orange. Empty the drip tray when the indicator shows it is full to prevent overflow.
Frothing Milk for Cappuccino and Flat White
To prepare milk-based drinks, lift the steam wand and remove the milk jug. Ensure the whisk is firmly attached to the bottom of the jug. Have a damp cloth ready before starting, as milk residue dries quickly on the hot steam wand.
Pour semi-skimmed, whole, or skimmed milk into the jug. The machine includes milk level guidelines on the side of the jug for cortado, cappuccino, and latte. A practical starting point is to fill the jug to the black dot marked on the side, which works well for flat whites and cappuccinos.
The machine supports both dairy and plant-based milk. Press the milk type button to toggle between options. Use the froth dial to select your desired milk texture: steamed milk only at the lowest setting, light froth for flat whites and lattes at the second setting, cappuccino-style froth at the third setting, or cold froth for iced coffees at the highest setting.
Position the milk jug under the steam wand and lower the wand into the jug so it sits on the base. The wand must sit securely on the metal dot that controls milk temperature. Press the froth dial to begin. The whisk will spin to create a vortex while the steam heats the milk.
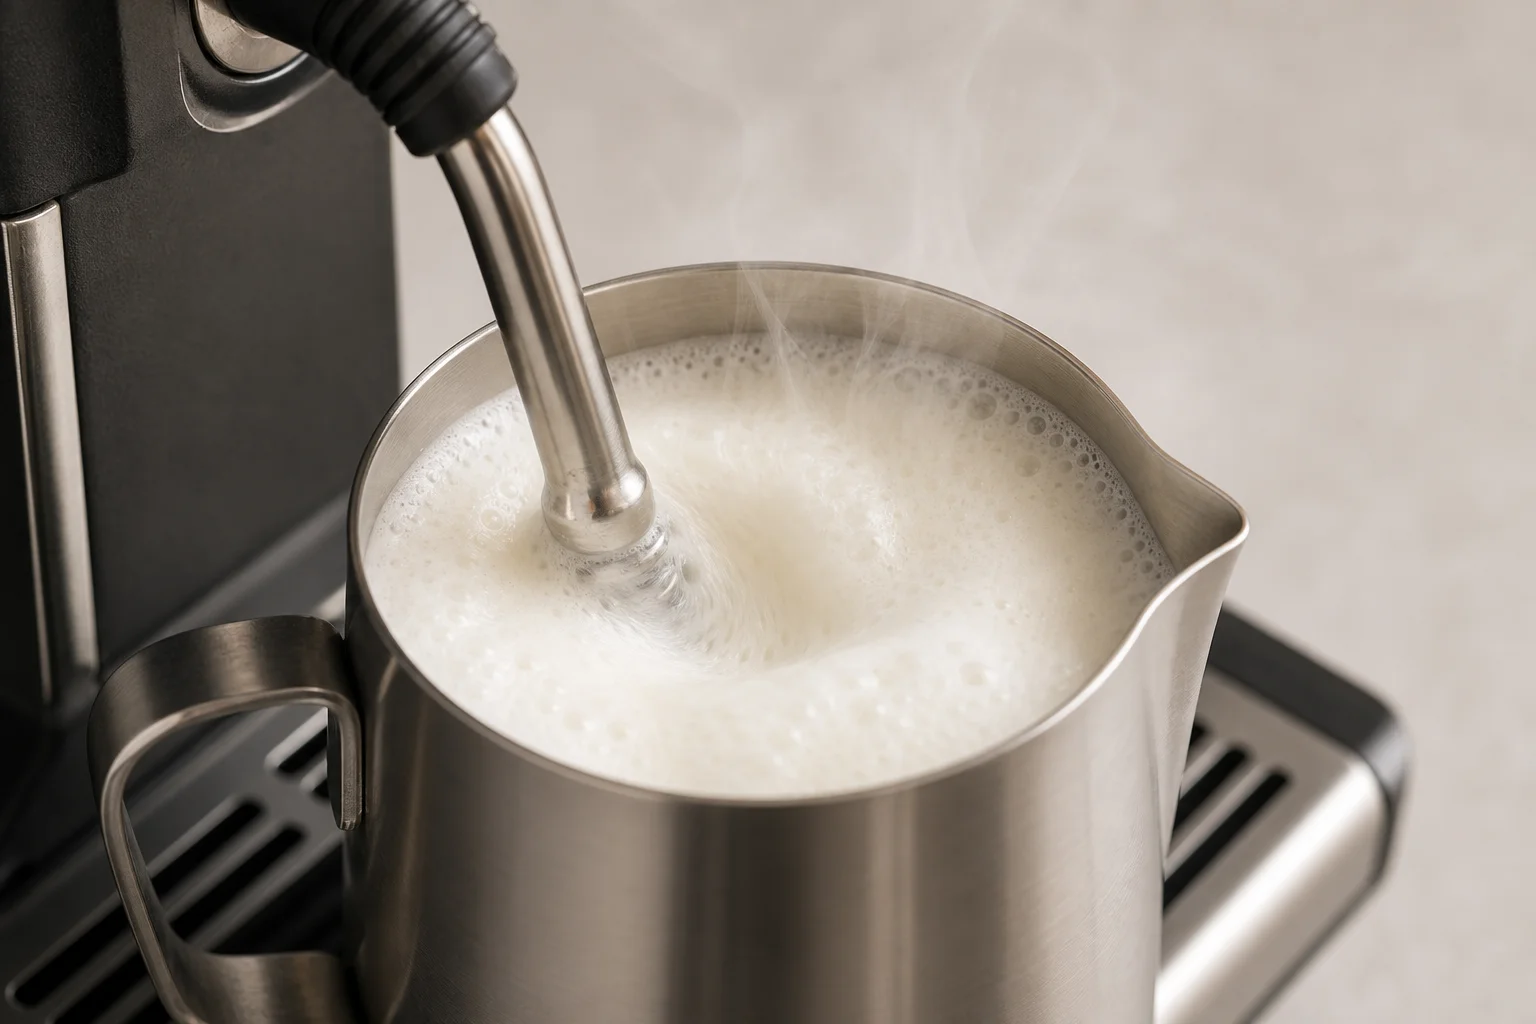
Once frothing is complete, immediately lift the steam wand and remove the milk jug. Wipe the steam wand with your damp cloth, paying attention to the crevices where milk accumulates. The machine will self-purge hot water through the wand into the drip tray to clean the internal passages. Do not touch the steam wand directly during purging, as it is extremely hot.
For a flat white, pour the milk gently into your espresso without excessive tapping or swirling. The goal is a thin layer of froth on top. For a cappuccino, you can tap and swirl the jug slightly to mix the milk and froth more thoroughly before pouring.
For maximum efficiency, set up the milk jug and select your froth level before pressing the espresso brew button. Once you press start brew for the espresso, immediately press start froth. The machine will automatically begin frothing as soon as the espresso finishes extracting, keeping your coffee hot and ready to combine.
Conclusion
The Ninja Cafe Luxe Premier Series simplifies espresso preparation through automation while maintaining control over grind size, strength, and milk texture. Following these steps in sequence will help you produce consistent, quality espresso drinks at home or in shared spaces like vacation rentals.
Product link
View more details for Ninja Cafe Luxe Premier Series
This product is mentioned in the review. Check the specifications, options, and compatibility before buying.
View more details for Ninja Cafe Luxe Premier SeriesFurther reading
Related Reviews
Coffee Machines
Best Bean-to-Cup Coffee Machines: Five Practical Options for Home Brewing
Five bean-to-cup coffee machines with distinct strengths, from compact retro style to versatile multi-brew systems. Find the right fit for your kitchen and coffee preferences.
Coffee Machines
Best Capsule Coffee Machines: Five Options for Different Brewing Needs
Five capsule coffee machines with distinct strengths, from compact single-serve units to versatile multi-brew systems. Real trade-offs to consider before buying.
Coffee Machines
Best Jura Espresso Machines 2026: Five Models Compared
A comprehensive guide to five Jura espresso machines, from the minimalist E4 to the flagship Z10, helping you find the right model for your coffee ritual.